Audio & Video Conferencing
Overview
Participants can broadcast their audio and video in a Unicko meeting. The host can grant attendees with permissions to turn on their microphone and camera.
Audio & Video Broadcasting
You can turn on/off the camera or microphone by clicking the buttons at the bottom of the screen:
- Gray color - No permission.
- Orange color - You can turn on the camera or microphone.
- Green color - Your camera or microphone is broadcasting.

Audio Settings
When you have several microphones, the browser automatically selects a microphone. To use a different microphone, click the options button, and then, under Audio Settings, select the microphone you want to use. This is useful when choosing between external or built-in microphones.
The meter displays microphone levels, allowing you to confirm that the microphone is working properly.
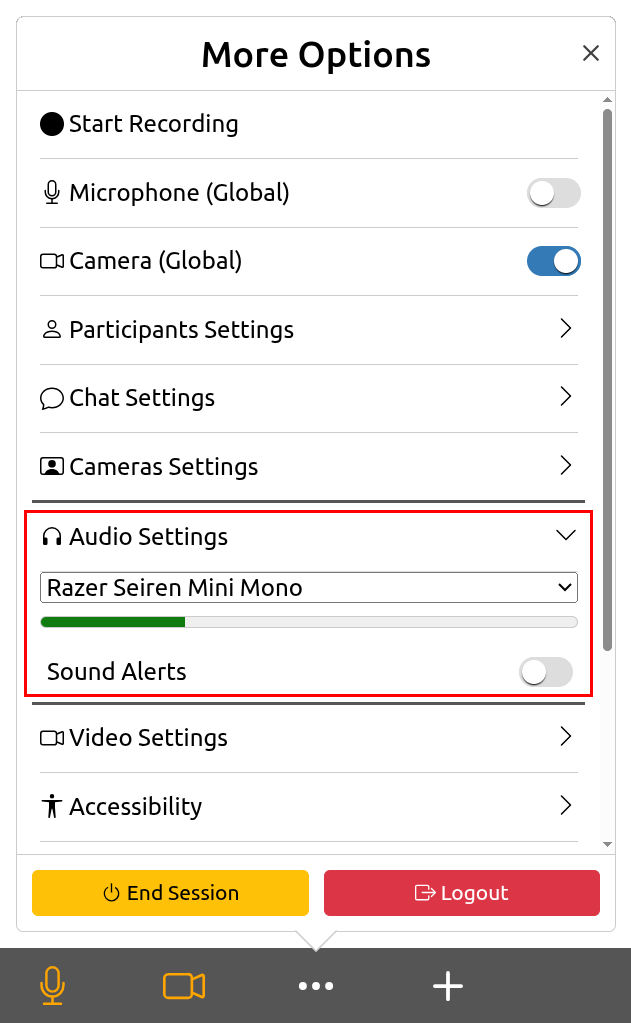
Sound Alerts
Sound alerts can be turned on if you wish to hear audio notifications when, e.g., users join the meeting.
Video Settings
To access a different camera, click the options button, and then, under Video Settings, select a camera. This is useful when choosing between front or back facing cameras or external or built-in cameras.
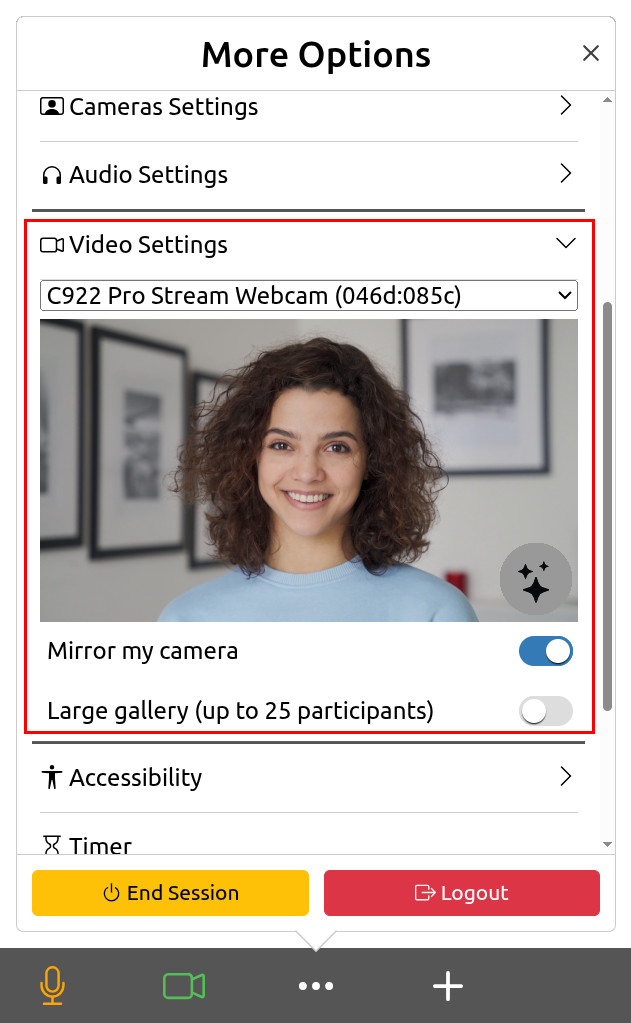
Mirror My Camera
You can mirror your camera view by enabling the Mirror my camera setting. This setting flips the video you see of yourself, so it appears as a mirror image. It does not change how other participants see you.
Large Gallery
The Large Gallery view allows you to display more participant videos on screen. By default, it shows up to 16 videos, but you can increase this to 25.
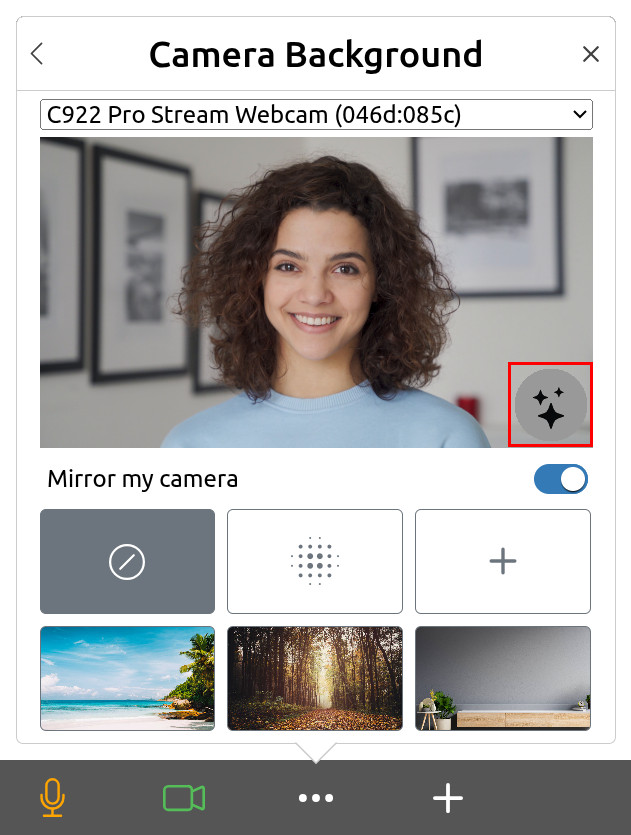
Replace Camera Background
To help limit distractions, you can blur your background or replace it with an image. To access this feature:
- Click the camera background button.
- To blur your background, click the blur button.
- To replace your background, select one of the images.
- To add a custom background, click the plus button and select an image with 1280x720 resolution in JPEG format.
Note: Sensitive information might be visible when you replace your background.
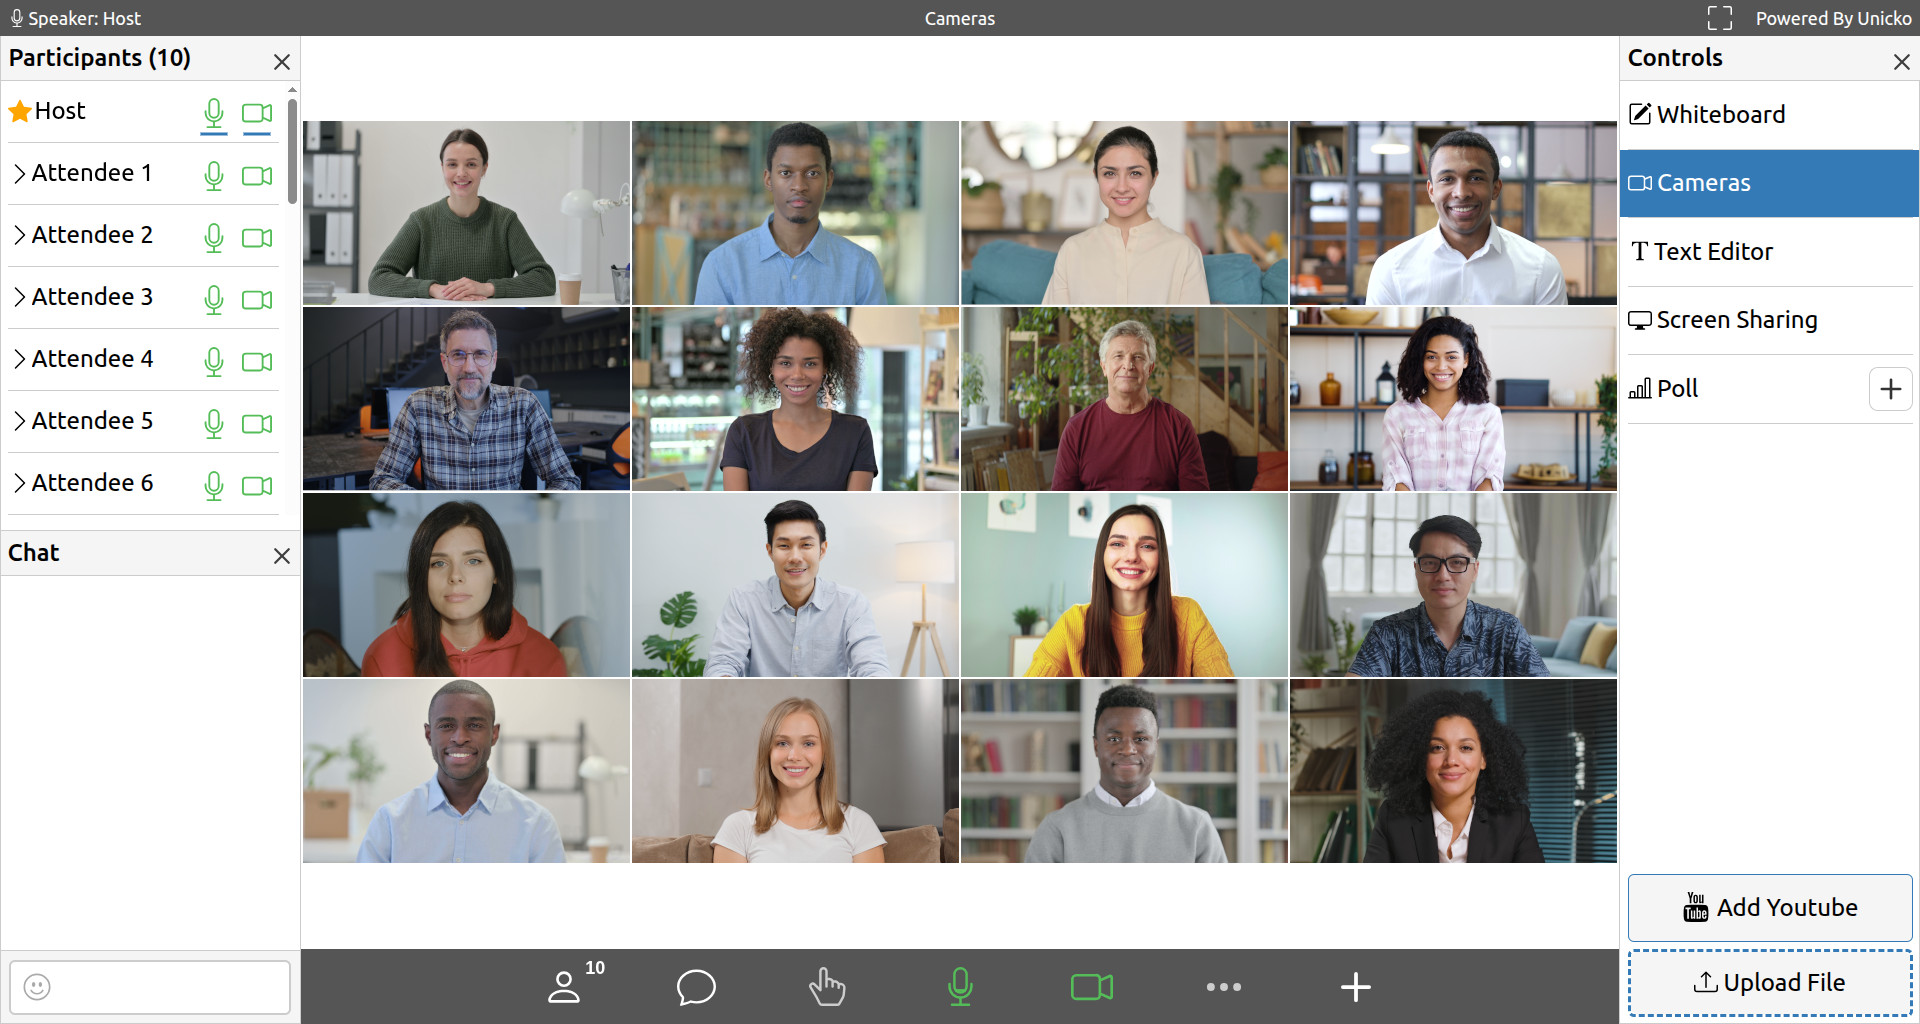
Video Layout
Participant videos are shown in the Cameras tab. The host can choose the layout:
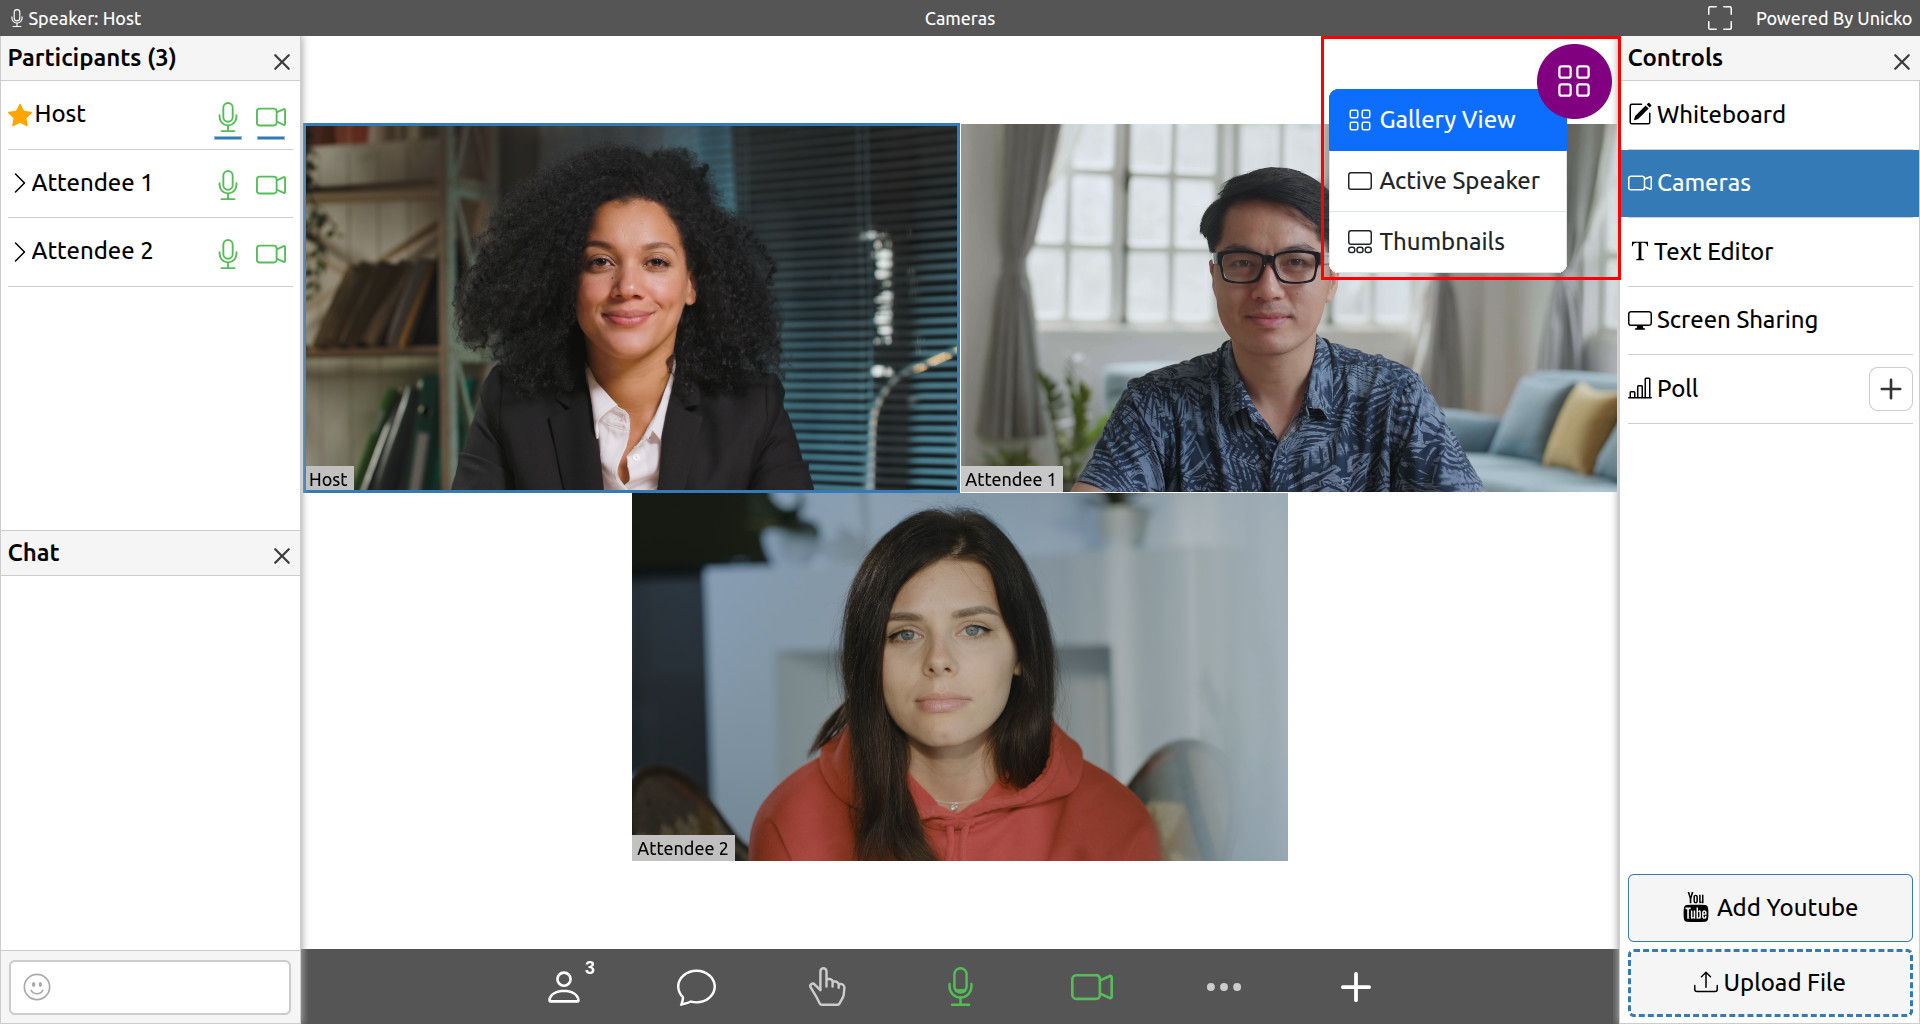
-
Gallery View displays up to 16 participant videos by default, or up to 25 videos if the Large Gallery view is enabled in the settings. If more videos are broadcasting, gallery view will show the participants who were the most recent active speakers, and you can navigate through additional videos using arrow buttons on the sides. The active speaker is highlighted.
-
Active Speaker displays a large view of the active speaker.
-
Thumbnails displays the active speaker with a strip of up to 8 thumbnail videos below. The thumbnails show the participants who were the most recent active speakers. If more videos are broadcasting, you can navigate through additional videos using arrow buttons on the sides.
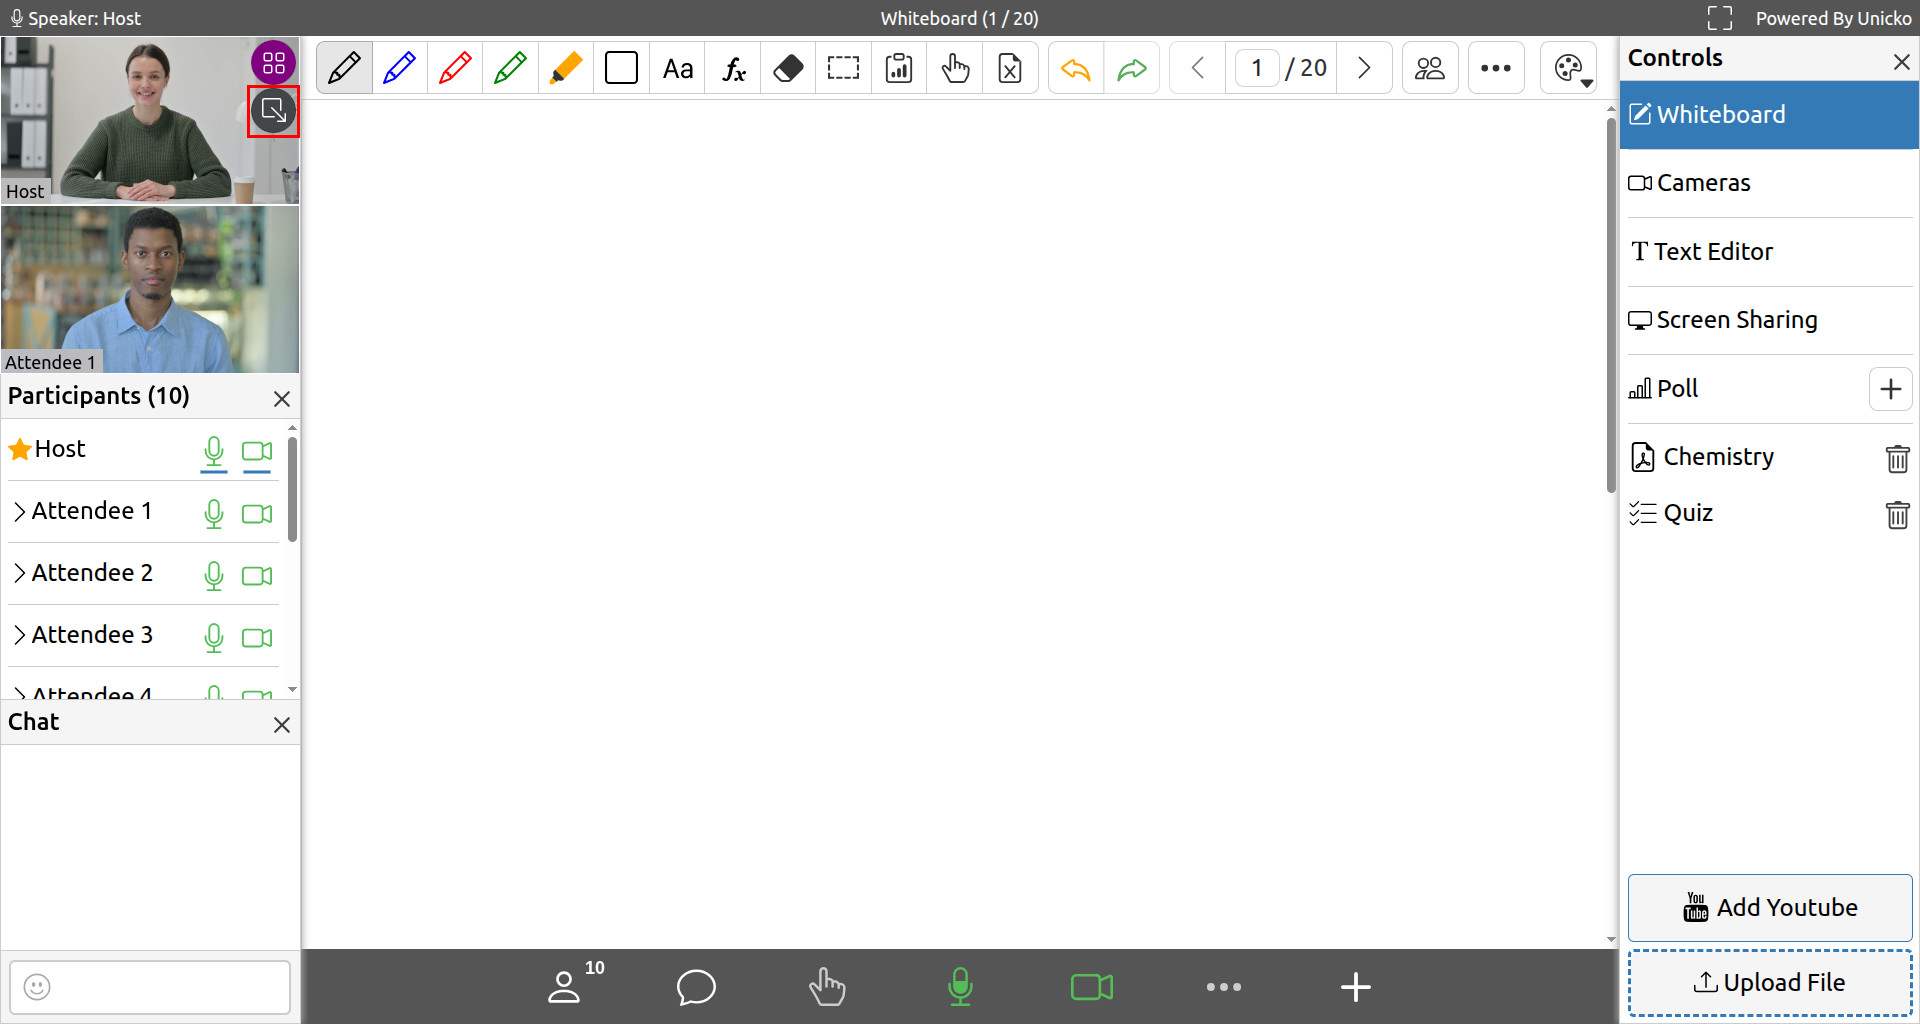
Panel View
When switching to another tab such as the whiteboard or text editor, the videos are shown in a smaller view, either at the side panel or at the bottom (depending on your screen size).
In panel view, users can enable the side-by-side view by clicking the side-by-side button.
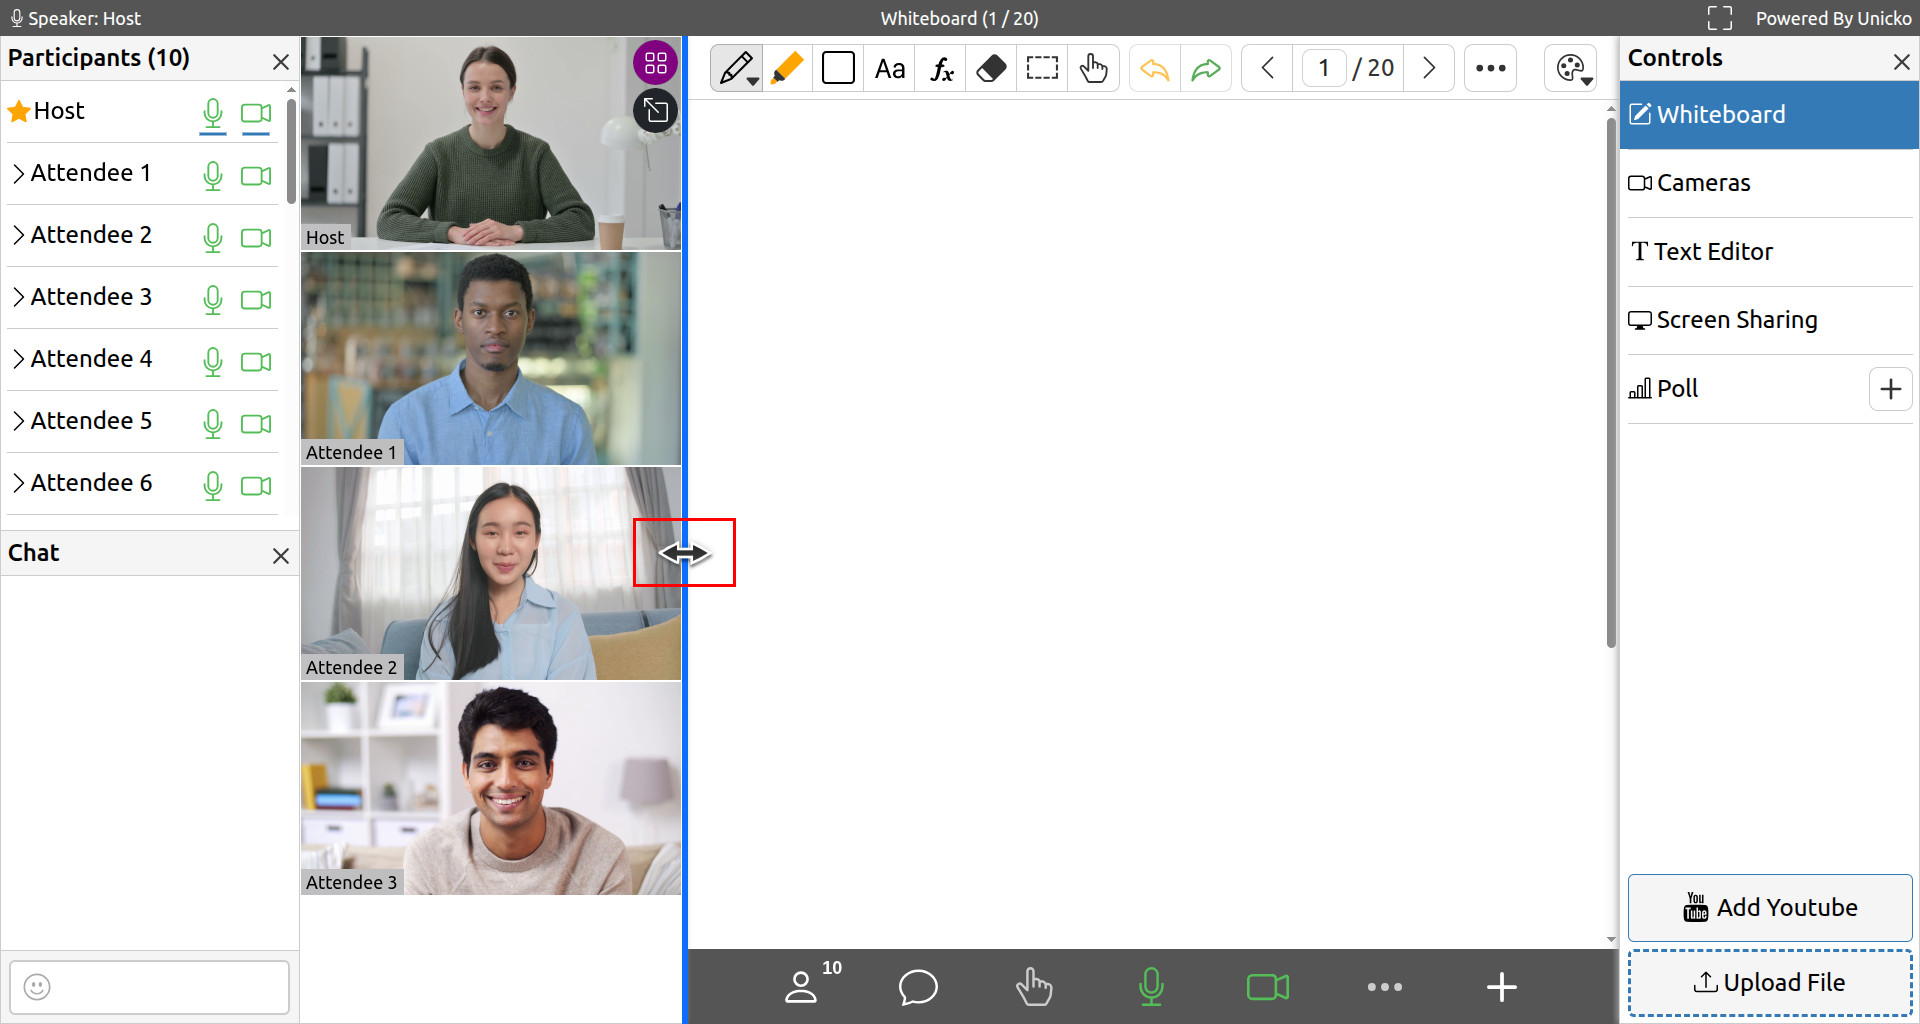
Side-By-Side View
Side-by-side view enables participants to view videos alongside the chat and participant list. They can also adjust the location of the separator to view more videos.
Lock Camera
When attendees have their cameras on, the host can lock up to 2 different cameras. The locked cameras will be displayed first in the gallery view and thumbnails.
To lock a camera click the lock icon in the top left corner of the display: